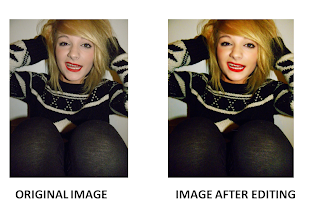
In order to make the image appropriate for my front cover I;
-Used the spot removal tool to remove all of my model's blemishes.
-Made a copy of the model without her blemishes and called it 'skin'.
-Used the quick selection tool to highlight all of the skin and then deleted the background so that only the skin was visible on the layer.
-Made 2 copies of just her skin.
-On the first skin, used Gaussian blur on 10 pixels to blur the skin.
-Used the same blur technique and pixels on the second copy of skin.
-Darkened the first copy of skin using blending options.
-Lightened the second copy using the same tool.
-Turned the background back on and used the eraser tool to carefully erase the lips, teeth and eyes - this way they were in focus while the rest of her skin remained blurred.
-With the two copies of skin on I selected the adjustments-levels tool and altered the levels until her skin owned a soft, appropriate glow.
-After merging all of the layers, I used the overlay tool to add to the glow.
This then made my model's skin look flawless and looked much more suitable for a music magazine front cover.-I then used the paint brush tool - colour white - to paint carefully over my models teeth and then adjusted the opacity of the colour.
This then made my model's teeth appear much whiter and a lot more appropriate for my front cover.

No comments:
Post a Comment